4 分钟
How to Secure API Keys Using Next.js Server Components
概述
我们可以使用Next.js服务器组件 来正确地保护API密钥,使其免于暴露在我们的dapp前端。为了进一步提高我们的API密钥安全性,我们还可以将我们的API密钥限制在Subgraph Studio中的某些子图或域。
在这本指南中,我们将介绍如何创建一个Next.js服务器组件,该组件可以查询子图,同时还可以从前端隐藏API键。
警告
- Next.js服务器组件不能保护API密钥免于被拒绝服务攻击耗尽。
- The Graph网络的网关具有拒绝服务检测和适当缓解策略,但使用服务器组件可能会削弱这些保护。
- Next.js服务器组件引入了中心化风险,因为服务器可能会宕机。
为什么需要它
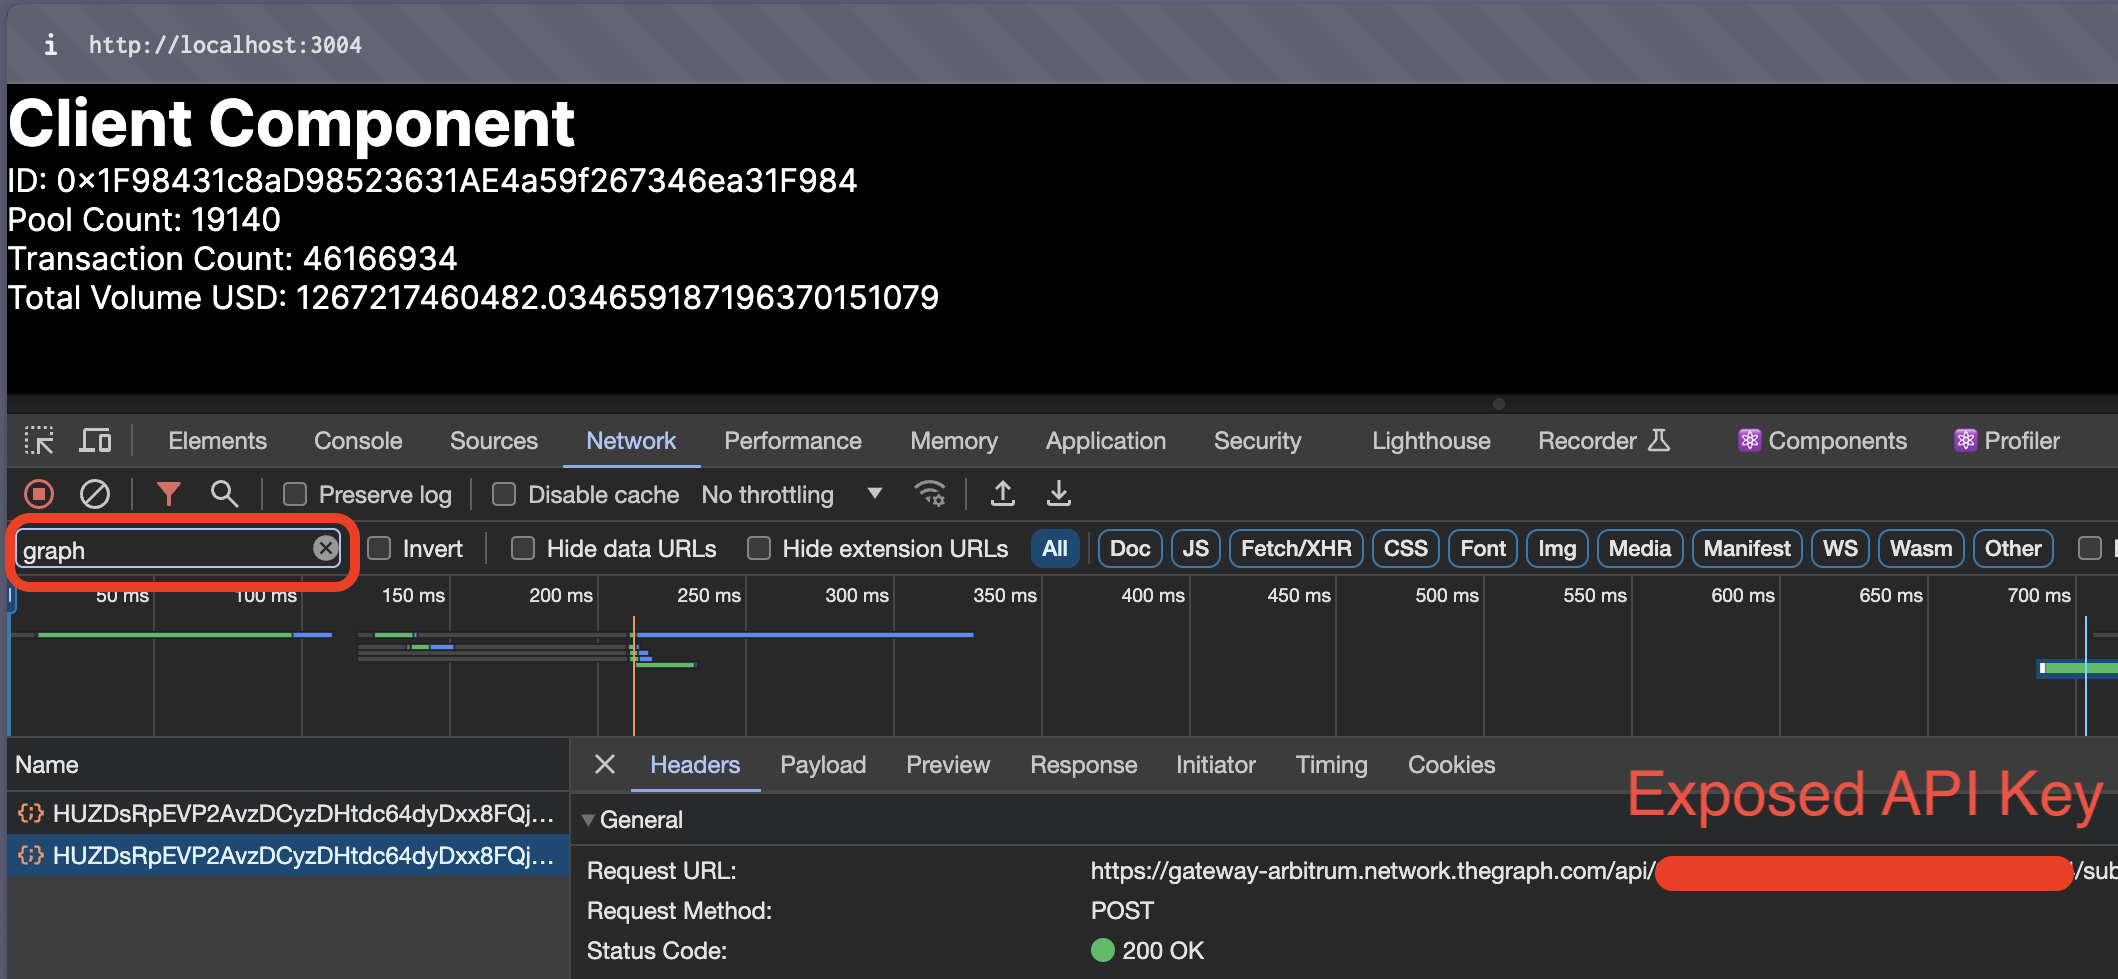
在标准React应用程序中,前端代码中包含的API密钥可能会暴露给客户端,从而带来安全风险。虽然通常使用.env文件,但它们并不能完全保护密钥,因为React的代码是在客户端执行的,在头中暴露了API密钥。Next.js服务器组件通过在服务器端处理敏感操作来解决这个问题。
使用客户端导入查询子图
先决条件
- 来自Subgraph Studio的API密钥。
- Next.js和React的基本知识。
- 一个使用App Router的现有Next.js项目。
循序渐进的指南
步骤1:设置环境变量
- 在Next.js项目根目录中,创建一个
.env.local文件。 - 添加API密钥:
API_key=<api_key_here>。
步骤2:创建服务器组件
- 在
components目录中,创建一个ServerComponent.js新文件。 - 使用提供的示例代码设置服务器组件。
步骤3:实现服务器端API请求
在ServerComponent.js 中,添加以下代码:
const API_KEY = process.env.API_KEYexport default async function ServerComponent() { const response = await fetch( `https://gateway-arbitrum.network.thegraph.com/api/${API_KEY}/subgraphs/id/HUZDsRpEVP2AvzDCyzDHtdc64dyDxx8FQjzsmqSg4H3B`, { method: 'POST', headers: { 'Content-Type': 'application/json', }, body: JSON.stringify({ query: /* GraphQL */ ` { factories(first: 5) { id poolCount txCount totalVolumeUSD } } `, }), }, ) const responseData = await response.json() const data = responseData.data return ( <div> <h1>Server Component</h1> {data ? ( <ul> {data.factories.map((factory) => ( <li key={factory.id}> <p>ID: {factory.id}</p> <p>Pool Count: {factory.poolCount}</p> <p>Transaction Count: {factory.txCount}</p> <p>Total Volume USD: {factory.totalVolumeUSD}</p> </li> ))} </ul> ) : ( <p>Loading data...</p> )} </div> )}步骤4:使用服务器组件
- 在我们的页面文件(例如
pages/index.js)中,导入ServerComponent。 - 导入组件:
import ServerComponent from './components/ServerComponent'export default function Home() { return ( <main> <ServerComponent /> </main> )}步骤5:运行并测试我们的Dapp
使用npm run-dev启动我们的Next.js应用程序。验证服务器组件是否在不公开API密钥的情况下获取数据。

结论
By utilizing Next.js Server Components, we’ve effectively hidden the API key from the client-side, enhancing the security of our application. This method ensures that sensitive operations are handled server-side, away from potential client-side vulnerabilities. Finally, be sure to explore other API key security measures to increase your API key security even further.