3 minutes
Secure API Keys with Next.js Server Components
An API key in frontend code is visible to anyone who opens the browser’s developer tools. Use Next.js server components to send Subgraph queries from the server, so the key never reaches the client. For more protection, also restrict your API key to specific Subgraphs or domains in Subgraph Studio.
This guide shows how to create a Next.js server component that queries a Subgraph while keeping the API key out of the frontend.
Caveats
- Next.js server components do not protect API keys from being drained using denial of service attacks.
- The Graph Network gateways have denial of service detection and mitigation strategies in place, however using server components may weaken these protections.
- Next.js server components introduce centralization risks as the server can go down.
Why It’s Needed
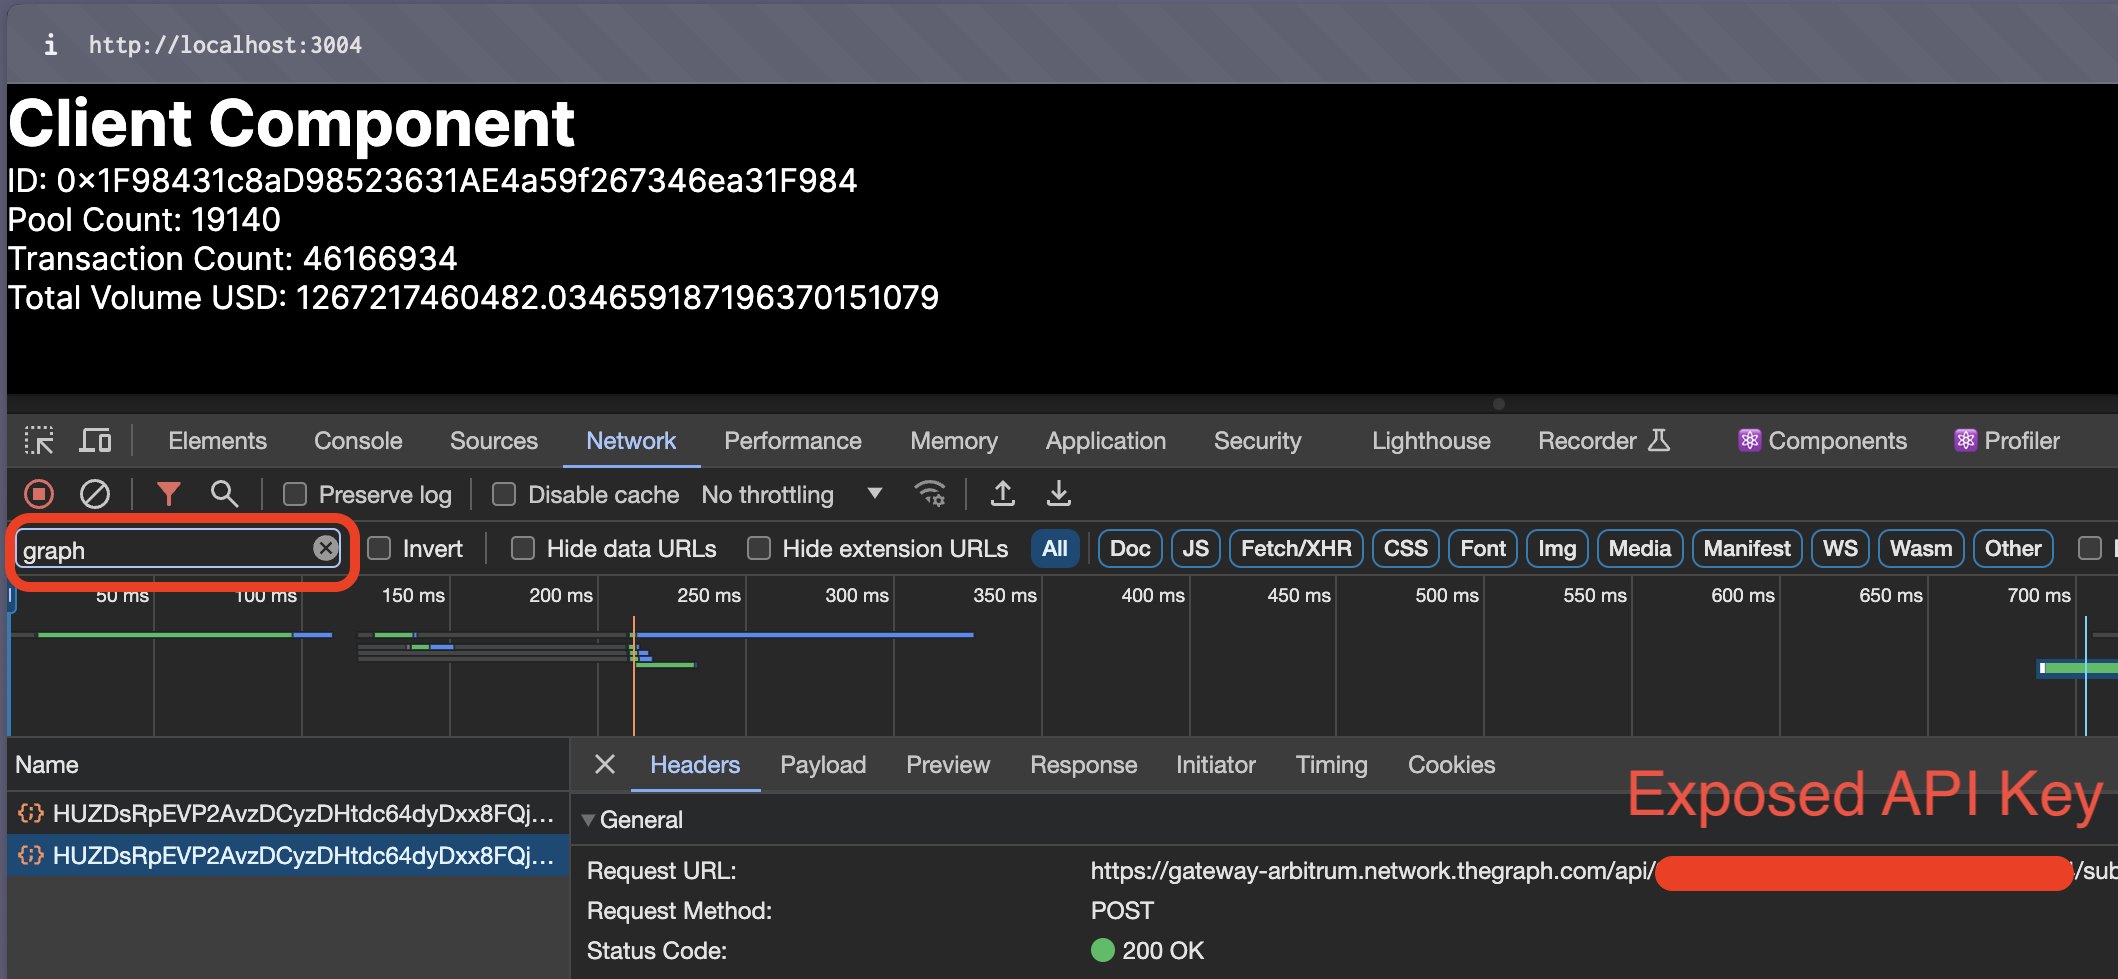
In a standard React application, API keys included in the frontend code can be exposed to the client-side, posing a security risk. While .env files are commonly used, they don’t fully protect the keys since React’s code is executed on the client side, exposing the API key in the headers. Next.js Server Components address this issue by handling sensitive operations server-side.
Using client-side rendering to query a Subgraph
Prerequisites
- An API key from Subgraph Studio
- Basic knowledge of Next.js and React.
- An existing Next.js project that uses the App Router.
Step-by-Step Guide
Step 1: Set Up Environment Variables
- In your Next.js project root, create a
.env.localfile. - Add your API key:
API_KEY=<api_key_here>.
Step 2: Create a Server Component
- In your
componentsdirectory, create a new file,ServerComponent.js. - Use the provided example code to set up the server component.
Step 3: Implement Server-Side API Request
In ServerComponent.js, add the following code:
const API_KEY = process.env.API_KEYexport default async function ServerComponent() { const response = await fetch( `https://gateway-arbitrum.network.thegraph.com/api/${API_KEY}/subgraphs/id/HUZDsRpEVP2AvzDCyzDHtdc64dyDxx8FQjzsmqSg4H3B`, { method: 'POST', headers: { 'Content-Type': 'application/json', }, body: JSON.stringify({ query: /* GraphQL */ ` { factories(first: 5) { id poolCount txCount totalVolumeUSD } } `, }), }, ) const responseData = await response.json() const data = responseData.data return ( <div> <h1>Server Component</h1> {data ? ( <ul> {data.factories.map((factory) => ( <li key={factory.id}> <p>ID: {factory.id}</p> <p>Pool Count: {factory.poolCount}</p> <p>Transaction Count: {factory.txCount}</p> <p>Total Volume USD: {factory.totalVolumeUSD}</p> </li> ))} </ul> ) : ( <p>Loading data...</p> )} </div> )}Step 4: Use the Server Component
- In your page file (e.g.,
pages/index.js), importServerComponent. - Render the component:
import ServerComponent from './components/ServerComponent'export default function Home() { return ( <main> <ServerComponent /> </main> )}Step 5: Run and Test Your App
Start your Next.js application using npm run dev. Verify that the server component is fetching data without exposing the API key.
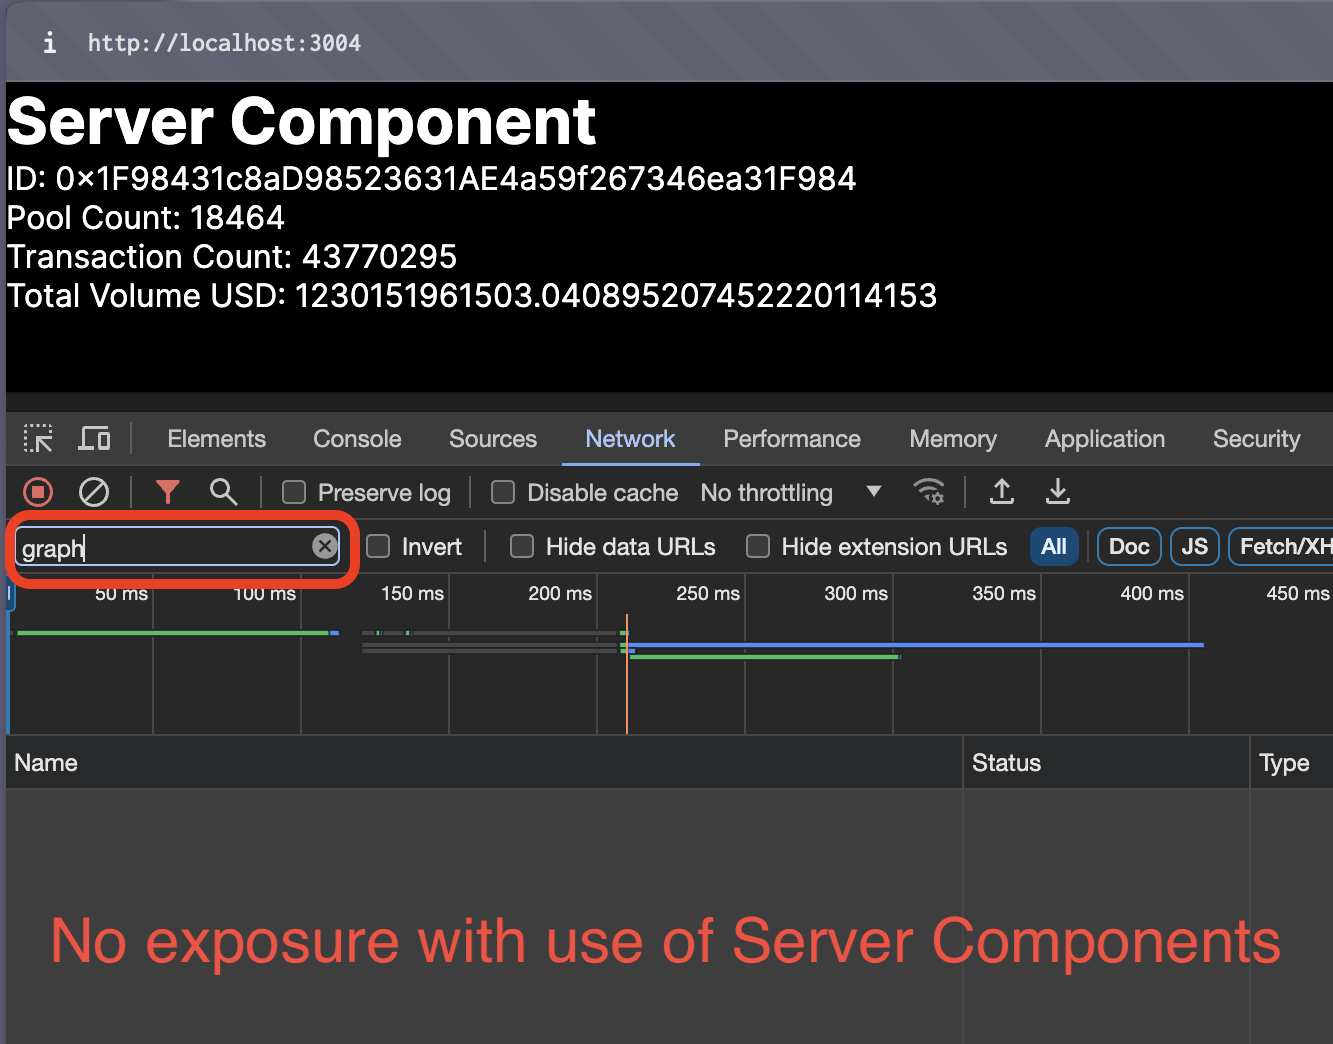
The API key now stays on the server, and the browser receives only the query results.
Learn More
- Managing API keys: restrict keys by Subgraph and domain, and set spending limits.
- Querying best practices: write efficient, cacheable queries.
- Guides & Best Practices overview: the full checklist and how this page fits with the rest of the section.